Introduction to animation
Week 1: 9th Sep 2024
Fundamental Principles of Animation
The objectives for this lesson was to build understanding of the fundamental principles of animation as well as to get a better understanding of reflective thinking and writing.
Animation is a series of images that are played one after the other to create the illusion of a movement.
Frame per second refers to the amount of frames that makes up a single second animation. Different frame rates have a different look to them.
Bouncing Ball Animation:
By using adobe animate we created an animation of a bouncing ball. We had to first use the oval tool to insert the first frame of the ball. The next step was to use the selection tool to make the following frames to create a moving image of the ball. While adding in the other frames I had the onion skin option from the timeline section turned on to help me with the next positioning of the ball. I then added another layer to the animation to add colour to the background.

What I found most difficult about this process was the positioning of the ball, I had to make sure that the bouncing of the ball looked as natural as possible for each frame. From this piece of animation I have gained the basic skills of creating animation and using this new skill I will be able to create a more complicated piece for next time. From this lesson I have learnt that each key fame contains a different animation and all together it creates a illusion of the images moving.
12 Principles of Animation
By this lesson our objective was to improve our understanding of the principles behind animation and the juxtaposing of frame to create the illusion of movement
Anticipation
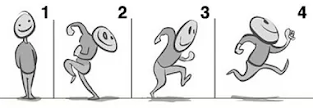 This principle in short is the subtle signal that something new is about to happen and to find out what is about to happen you must continue to watch.
Staging
Is when you set up the scene, from the placement of the character to the background and foreground, the mood of the character and how the camera angle is set up
Straight-ahead action and pose-to-pose
Straight ahead technique means to animate one drawing after another back in sequential order.
Follow through and overlapping action
This technique refers to how an object or character continues to move after the action that is set in motion has finished. This helps add realism and weight to the movement. This technique creates the illusion of physical momentum
Slow in and slow out
In terms of animation this term describes an important principle of which an object or character in animated video starts moving out in a much slower manner, then picks up speed and finishes with deceleration.
Arc
This technique creates an illusion of movement; it almost mimicked human movement, this helps bring a more realistic feel to the moving image.
Secondary action
This is an action that helps support the main act. It is an integral part of the animation that adds interest to the scene.
Timing
This refers to the time it takes for action to complete from the starting point to the end.
Exaggeration
This technique makes things bigger and smaller or more extreme then it would be in real life. It helps make the animation seem much more interesting.
Solid drawing
This principle makes the drawing look three dimensional and makes it more believable with the added volume, weight and balance.
Appeal
This makes the character or design stand out to the viewer. It helps the viewer to feel more interest when adding more appeal to the design
Facial Expression Animation:
Using adobe animate we created a animation of a changing facial expression. Using the skills I acquired from the previous bouncing ball task I first added my first frame using the pen tool to draw my first facial expression. After creating my first frame I selected the selection tool to copy and paste the first animation so I can use the same head for the next facial expressions. I turned the onion skin option on so I can tell where to place the changed facial feature. I repeated this until I got the the desired amount of frames and exported the video as a gif.
From this task I've learnt that to make the change in expression/movement look more natural I should use more frames to show the change gradually taking place other then really quickly which makes the change look more choppy.
Week 2: 16th Sep 2024
Basics of cinematography and shot sizes
Camera shots and angles are important to set the atmosphere and to help strengthen the narrative for the audience.
The angle from which you shoot and the camera's distance from the ground determines what camera shot your using.
Types of Camera Shots:
Extreme long shots usually contain a large amount of landscape. The purpose of this shot is to establish the setting of the scene.
Long Shots are used to show the whole subject in its environment. It contains the landscape but also the whole scene.
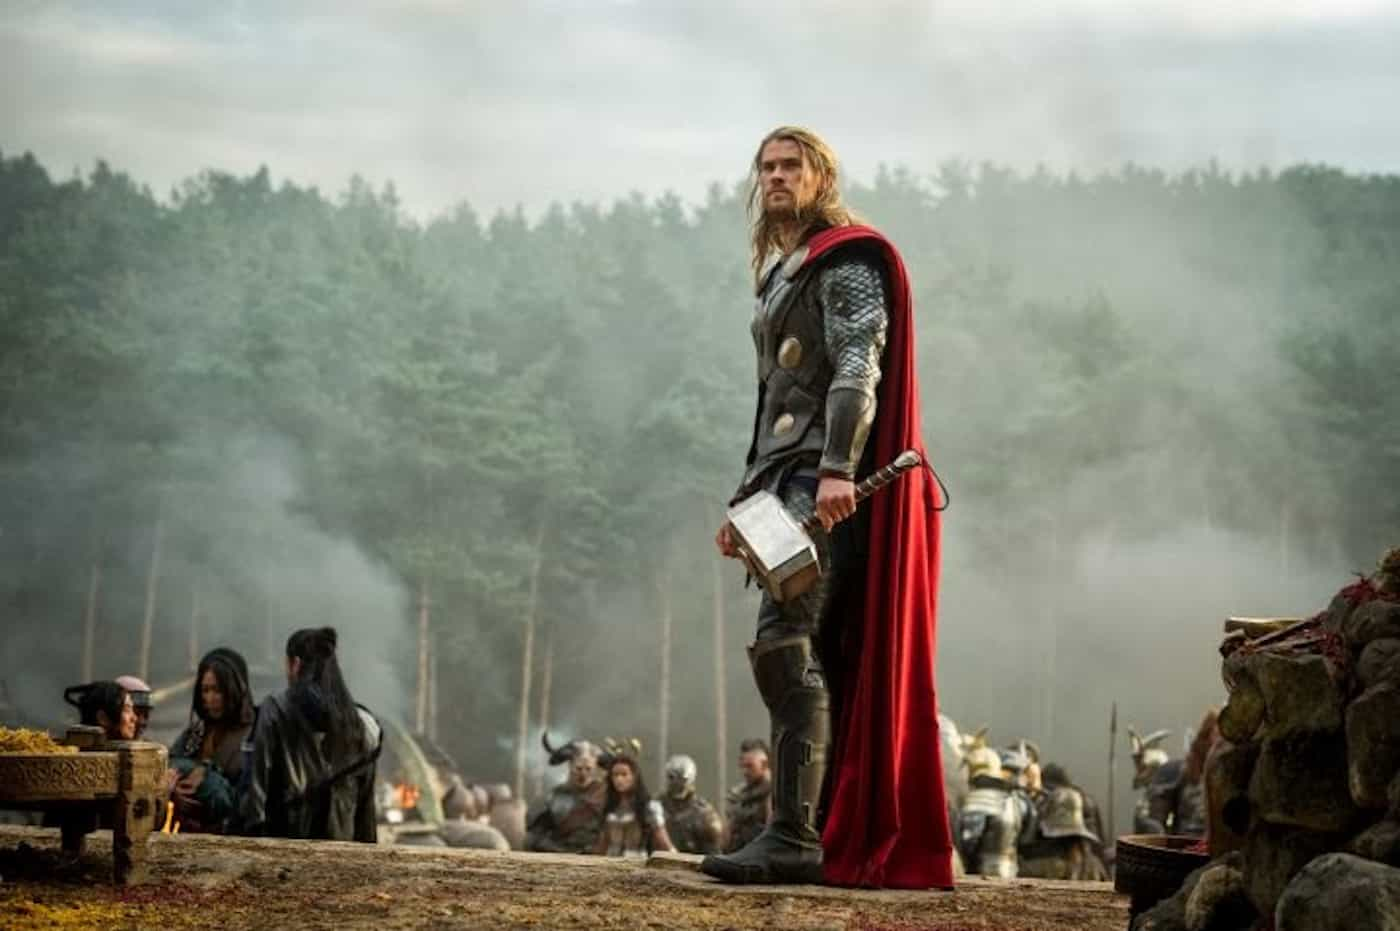
American Shots contain the character from waist up or show them from around the mid thigh or knees up. This shot allows them to capture the character's posture and the way they are positioned when they are doing any type of lower body action such as drawing a weapon.
Shot Reverse Shots are usually over the shoulder, it contains two camera angles one of which focuses on one of the characters and the angle is reversed to the other character. This technique is commonly used to show the reaction between characters during a dialogue.
180 Degree Rule is important guideline in filmmaking. This technique ensures the viewer understands where the subject is located within the scene in relation to the other. The positioning of the character might seem to swap.
Close up shots usually focuses on one character's face or a detail of an object. The purpose of this shot is to convey strong emotion so the viewers are able to see facial expression and reaction that they might not catch if the shot is wider.
The Kuleshov Effect is a film editing effect that shows that the same shot that has neutral expression can create different emotion depending on the shot style. This effect is used to enhance storytelling, it guides the audience reactions and allows them to imagine a deeper meaning.
Extreme close ups are used when you want to focus on the face or a object. It helps isolate the detail you would like to focus on and creates intense emotion and allows the audience to see the changes of the expression that might be missed if the shot is wider.
High angle shots are taken from above the subject, this angle allows the character look weaker or more vulnerable. This angle is useful in scenes when the character is in position of disadvantage.
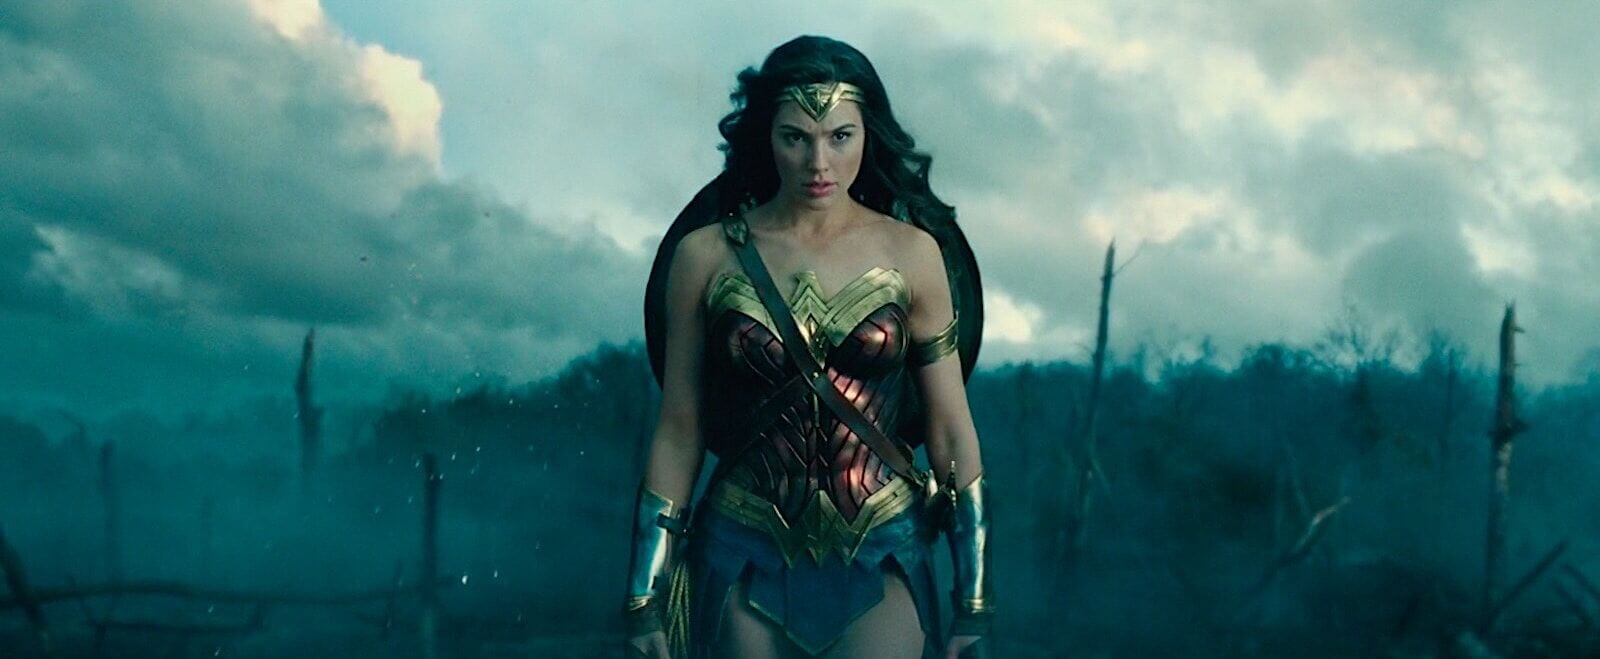
Low angle shots are taken from below the subject and this perspective makes the character look powerful. It helps convey a sense of dominance and power.
Bird's eye view shots are taken from right above the subject this technique gives a perspective of the character from a birds point of view. This can help the audience to understand the relationship between the characters and their environment
Eye level shots are taken at the subjects eye level which creates a sense of realism and a relatable perspective with the audience
Dutch tilt is when the camera is slightly tilted, this technique is used to create a sense of instability that makes the shot much more chaotic and tense for the audience.
Adobe Animate:
Using adobe animate I created two types of shots: long shot and close up shot. Using my knowledge on cinematography I was able to create a long shot animation that helps establish the setting to the audience, and a close up shot that focuses on the characters facial expression as well as their gestures/movements in close up so that the audiences focus is all on the character.
In future i would like to animate a birds eye shot so I can show the relationship between two characters as well as establish the setting to the audience. Another shot I would like to animate in future is the eye level shot which helps create realism and helps create a realistic perspective.
Basics of Microphone types and Audio Components
When creating a film or a video, sound makes up 50% of what the viewer experiences.
There are three main audio components that make up soundscape:
- Foley sounds effects are sounds that are made or recreated in post production. Its the reproduction of everyday sound effects that are added after the film to enhance the audio quality
- Music that is added to the film or video helps set the mood and tone too the audience
- ADR ( Automated Dialogue Replacement ) is the process of re recording an actor's dialogue. This helps dub new dialogue during post production.
Basic Microscope Types:
Microscopes come in different shapes and sizes and each one of them pickup sound differently.
- H2 Handy Zoom Recorder Directional: It has a 120 degree pickup pattern
- RODE-NTG2 (shotgun mic) Directional
- AKG D230 (reporter mic) Omnidirectional
Additional equipment that are essential is the XLR Cable
Recording Process:
To record foley sounds and a dialogue we borrowed the following equipment: the shotgun mic, the handy zoom recorder, XLR cable and headphones.
We went out in a group and designated each person to one one job to create the foley sounds, this helped us to be organised while recording.
I found the process of recording to go in a organised manner as we were able to work together to create good recordings.
As we were using a shotgun it was easier to record a dialogue that was spoken by one person so all we had to do was point the mic at the person that was speaking and the recording was clean without other noise. Another factor for the recording being so clean could have been that we recorded the dialogue in the recording room which cancels any noise from outside of the room.
In future I would like work with dialogue audio as I would like to learn how to match the audio to create perfect lip syncing.
Week 3: 23rd Sep 2024
Lip Synching Animation
In this lesson we were supposed to trim, normalise and export audio from Adobe Audition. As well as to build our confidence with Adobe Animate's tools by creating a lip-synched animation using original audio.
As we were having technical issues during this lesson we couldn't use our original audio that we recorded from the previous lesson, but we were still able to create our own lip synched animation for a audio that our teacher provided us with. This lesson helped me build my confidence with using adobe animate as I was able to look into using more difficult techniques.
Flaps are the term that animators use to refer to lip movements.
Lip sync/lip-synch (short for lip synchronisation) this term means to match lip movements (flaps) with sung ort spoken words to create a illusion of speech.
When animating lip syncing you can use simplistic shapes or more detailed shapes depending on the character. The shape of the mouth can depend on the nature of the character's design and how the character says the words.
Lip Synching Exercise:
We first moved on to this exercise which first included us to make our own lip shapes on a single keyframe. The image below is the series of lip shapes I created in the given time.
Insert Image Here
After creating the different mouth shapes we moved on to actually creating the lip syncing.
We used the audio clip we were provided with in the template document.
I used my own lip shapes and head of the character for this task. While creating the lip syncing animation I had to make sure that the changes I was making were in the right layer. I found it difficult to maintain a synchronised look with the lip movement but with some tweaking at the end I was able to create a acceptable piece of work.
Insert Video Here
Week 4 : 30rd Sep 2024
Stop Motion Animation Experimentation
During this lesson we were able to understand the practical skills relating to different animation methods. We also learnt how to use editing tools for the use in video and post production.
Stop motion is a animation method whereby you physically manipulate objects to make it seem as they are moving on their own. Stop motion is created by moving the object in small increments between individual photographed frames, creating the illusion of movement with the series of frames when juxtaposed together and played as a continuous sequence.
Instead of drawing like animation is done stop motion uses physical objects, which creates a unique look to the produce and it is much more quick and easy to produce.
Planning: In our groups we were told to plan our own stop motion videos with the objects we were allowed to choose. Once we selected the objects we wanted, my team and I started to sketch a simple idea of how we wanted our objects to move and how many frames it will take for the object to move to the spot we wanted to be. We planned a general time slot for the whole clip and then proceeded to shoot the stop motion.
Shoot: In my group we had a designated camera person, person that moves the objects and someone that keeps track of the number of frames. This helped the team come up with a organised and good outcome.
The outcome (stop motion):
I feel as if this stop motion could have been better if there was a consistent background or even a normal blank background, it would have allowed the actual movement of the objects to stand out.
Week 5: 7th Oct 2024
Understanding Idents and Storyboarding for Moving Image
In this lesson, we had to understand what TV idents are and the impact that persuasive have through research and develop practical skills with drafting storyboards for films.
An ident is a brand name or symbol that helps the viewer identify the channel or service they are watching.
Idents are similar to adverts, they both promote something but adverts usually market a specific product that can be sold.
The purpose of idents is to establish the brand of a channel they do this by attracting the audience to the brand through the look and feel of the brand. It also works as a short pause between programs and adverts
Idents are a great way for young filmmakers to express their creativity in different ways, as they relate to other brands, filmmakers can be experimental and try out new ideas with them. Some idents rely on simple filming techniques, while some use high-budget practical elements.
Practice Storyboarding
Week 6 : 14th Oct 2024
Ident Project - Planning
In this lesson, we had to apply our understanding of media production to plan for a team animation project and to apply our knowledge of idents to design and produce an original piece.
We were told to make our own ident for Stanmore College in our own teams. The ident should include the name ' Stanmore College ' in Orbitron font, including at least one of the persuasive devices we learned.
My initial idea for the project when it was explained was to create an ident based on film assuming that no one in the team had the skills animation. Once discussing with the team, we came up with the idea of using both film and animation as a way of using all our skills usefully.
I think we will develop the skills of using camera equipment and editing skills, as well as the skills of teamwork.
At the start of this lesson, we brainstormed as a group about what we were planning to do for our ident. This is what we came up with in the end: we planned the colour theme, what types of shots we wanted to include, what kind of tone we wanted to use as well as how long we wanted the ident to be.
Using the ideas from the brainstorming we all created our own storyboard on a scene that we all agreed on.
Practice Shoot:


No comments:
Post a Comment